Pool Solar Heating Leak Repair
Solar Panel Leaks, Rubber Coupling Failures, Roof Line Cracks, and How to Fix Them Safely
Pool solar heating systems are simple in principle. Pool water is diverted through solar panels, warmed by the sun, and returned to the pool. Because the system usually runs at low to moderate pressure, many pool owners assume leaks are minor. In reality, a solar leak can waste large volumes of water, reduce heating performance, introduce air into the circulation system, and damage roof structures if it runs unnoticed. Solar leaks also create confusing symptoms because water can drip far from the actual leak point, especially on a roof.
This guide explains the most common solar heating leak locations, how to confirm the leak source, and the repair options that produce reliable long term results.
Solar heating leak symptoms: water loss, wet roof areas, and air bubbles
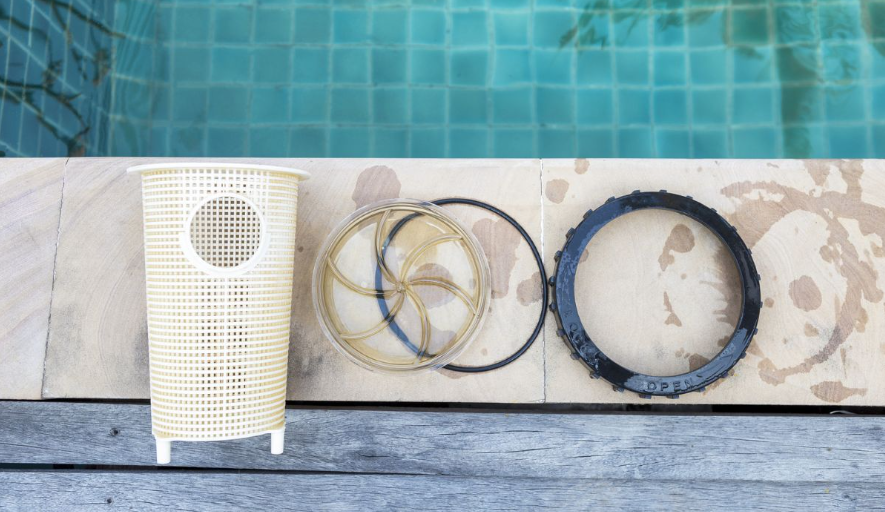
A solar leak often shows as unexplained water loss that increases when the pump is running and the solar system is activated. You may notice water dripping from the roof edge, wet patches on exterior walls, or water pooling near downpipes. Inside the pool system, you may also see air bubbles in the pump basket and bubbles at the return jets, because solar leaks can pull air into the lines when the pump shuts off and the panels drain back.
Another common symptom is reduced heating. If water is leaking out before it completes the solar loop, flow through panels becomes inconsistent and heat transfer drops. You may also hear gurgling sounds in the solar lines, especially at startup, which can indicate air in the system or poor drain back behaviour.
Solar system components that commonly leak
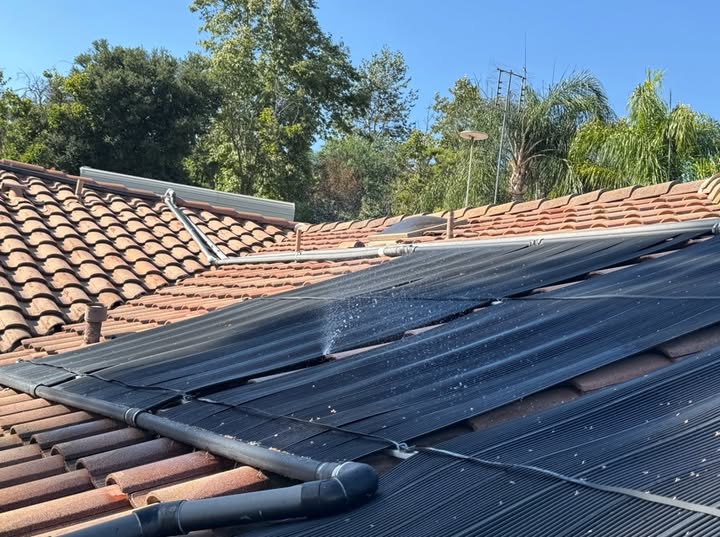
Most solar heating leaks occur at connection points rather than in the middle of a panel. Rubber couplings, hose clamps, and union fittings are frequent failure points because rubber degrades under sun exposure and temperature cycling. Panel headers can crack where they connect to supply and return lines. Roof mounted pipes can crack at joints or develop pinholes if the material has aged or been stressed by movement.
Valves and check valves on the solar loop can also leak, especially at unions and O ring seals. A failing vacuum relief valve or air vent can drip. These components are small, but because they sit at high points, they can leak steadily when the system is running.
Solar valve and bypass diagnosis: is water actually going through the panels
Before chasing roof leaks, confirm that solar is truly engaged. Many systems use a solar controller and actuator valve that diverts water through the panels when conditions are suitable. If the bypass valve is mispositioned, water may not be flowing through the panels at all, which can hide leaks during testing. Conversely, a partially open bypass can create unusual pressure and flow patterns that worsen leaks at weak couplings.
A practical check is pipe temperature. When solar is active, the return line from the roof usually feels warmer than the supply line once the system has been running. This confirms water is circulating through the panels.
Roof line leak inspection and safe leak isolation
Solar leak inspection should be done safely. Roof work is risky, and wet surfaces increase slip hazard. The safest first step is isolation. Switch off the pump, then close the solar isolation valves if your system has them. This stops flow to the roof loop. Then run the pump with solar isolated and observe whether water loss and bubbles change. If the leak symptoms reduce significantly when solar is isolated, the solar loop is strongly implicated.
If you can visually inspect the roof from a safe position, look for drips at the panel headers, wet streaks under couplings, and water trails along piping runs. Many leaks are visible at clamps and joints because water follows gravity and leaves clear wet tracks.
Rubber coupling and clamp failures: the most common solar leak repair
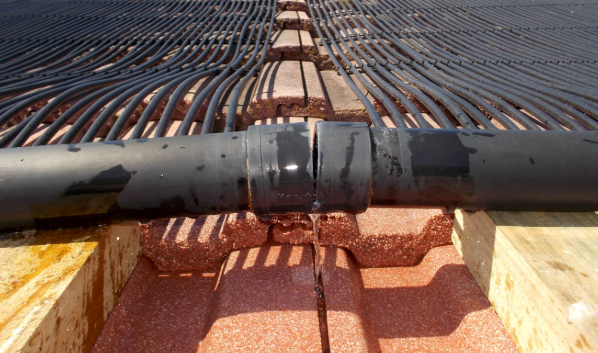
Rubber couplings and hose clamps are common failure points because rubber hardens and cracks under ultraviolet exposure and heat. Clamps can also loosen over me. Leaks here often show as dripping at the panel connection points and wet streaks under the coupling.
Repair usually involves replacing the rubber coupling with a new coupling of the correct diameter and temperature rating, and replacing clamps if they are corroded or distorted. Tightening a clamp sometimes stops a minor drip, but it is rarely a long term fix when rubber has aged. The better repair is replacement rather than repeated tightening.
Panel header cracks and solar mat damage
Solar panels can develop cracks in the header or at connection ports, especially if the panel has been stressed by roof movement, incorrect mounting, or freezing in some climates. A header crack often leaks more under higher flow and can create a spray pattern rather than a drip.
Repair depends on panel design. Some small cracks can be patched temporarily, but long term reliability usually requires replacing the damaged panel section or header component. Because solar panels age as a set, a single panel replacement can restore system integrity, but if multiple panels are brittle, a broader upgrade may be more cost effective.
Solar pipe joint leaks and roof plumbing movement
Roof plumbing joints can leak due to aging PVC, poor solvent welding, or movement at roof penetrations. These leaks often appear at elbows and unions where stress concentrates. Repair typically involves cutting out the leaking joint and replacing it with new fittings and pipe, ensuring proper support and alignment so joints are not under strain.
Support is important. Unsupported roof piping can sag and pull on joints, causing repeat leaks. A proper repair includes secure mounting so the pipe does not move under thermal expansion and contraction.
Check valve, vacuum relief valve, and air vent leaks
Solar systems often include a check valve to prevent reverse flow and a vacuum relief valve to allow drain back and prevent panel collapse. These components can leak at threads, O rings, or housings. A leaking vacuum relief valve may drip consistently when solar is on and may also allow air ingress when solar drains, increasing bubbles in the pump basket.
Repair often involves replacing the valve or replacing seals. Because these components are relatively inexpensive compared to water loss and roof damage, replacement is often the practical choice.
After repair: pressure test behaviour, air purge, and heating confirmation
After solar leak repair, the system should be run and observed. Confirm no drips are visible at couplings and joints. Confirm that the pump basket remains mostly free of bubbles once air purges. Some air at startup is normal because roof lines can trap air. It should clear as the system stabilises. Confirm that return water from solar is warmer and that pool heating performance improves.
Monitor pool water level over 24 hours to confirm the leak is resolved, especially if water loss was significant. If the system still shows bubbles and water loss, there may be another leak point or a valve sealing issue in the solar loop.
Preventing repeat solar heating leaks
Solar systems last longer when couplings and clamps are maintained proactively. Replacing aged rubber couplings before they fail prevents roof leaks. Ensuring roof pipes are supported reduces joint stress. Keeping valves and unions in good condition prevents drips at the equipment pad. Maintaining stable filter pressure and flow rate helps because extreme flow conditions can stress solar components.
Pool solar heating leaks most often occur at rubber couplings, clamps, panel headers, roof pipe joints, and valves such as check valves and vacuum relief valves. Diagnosis begins by isolating the solar loop and observing whether symptoms reduce. Repairs range from coupling replacement to panel replacement depending on damage. After repair, the system should be tested for drips, air bubbles, and temperature gain. Addressing leaks early prevents water loss, protects roof structures, and restores solar heating performance.
FAQs
1. How much water loss is normal for a pool?
About 1/4 to 1/2 inch per day from evaporation is normal in warm weather.
2. Can small leaks cause big damage?
Yes. Even a small leak can cause soil erosion, deck damage, and equipment strain over time.
3. How long does leak repair take?
Minor repairs can take a few hours. Major repairs may take several days.
4. Will insurance cover pool leak repairs?
5. How often should I check for leaks?
Get in touch for expert pool care

Need help? we are always here to assist you with expert care
Need Help
+27 10 065 1995
E-mail us
info@poolquest.co.za