Pressure Gauge Replacement Guide
Accurate PSI Readings, Correct Installation, and How to Use Your New Baseline
A pool filter pressure gauge is one of the most useful diagnostic tools on your equipment pad. It tells you when the filter is loading with debris, when flow is restricted, and whether your system is operating in a normal range. But gauges fail often. They stick, they drift, they crack from weather exposure, and they give false readings that lead to unnecessary backwashing, unnecessary cartridge cleaning, and misdiagnosed pump problems. Replacing a pressure gauge is simple, but doing it correctly matters because a leaking gauge port can create water loss and air issues.
This guide explains how to tell when a gauge is faulty, how to replace it safely, and how to use the new reading as your clean pressure baseline.
Faulty gauge symptoms: stuck needle and impossible readings
A healthy gauge returns close to zero when the pump is off and the filter is depressurised. If your gauge stays at a random PSI when the pump is off, it is not reliable. If the gauge needle jumps erratically, vibrates heavily, or reads far higher or lower than expected without matching changes in return flow, it may be failing.
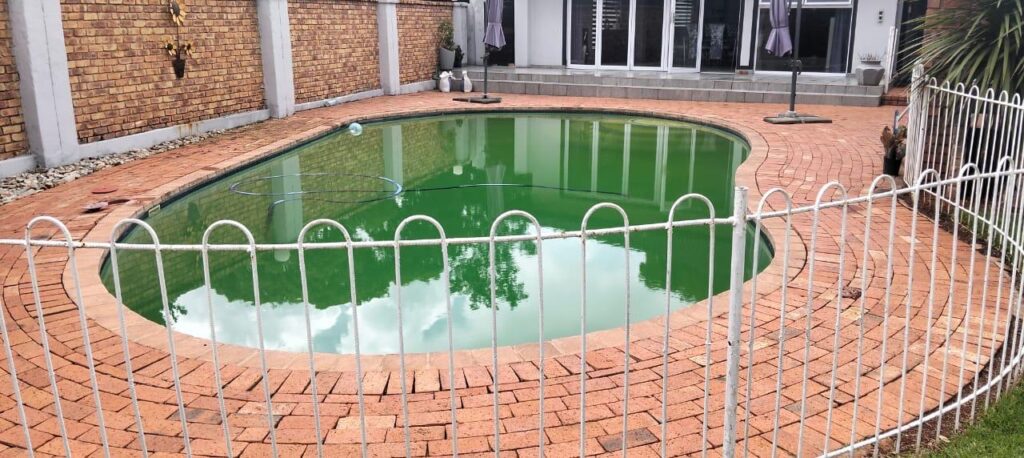
Another common sign is a cloudy lens, water inside the gauge face, or rus ng around the gauge fitting. Outdoor heat and UV degrade gauges quickly. If you have cleaned the filter and flow improved but the gauge reading did not change, a faulty gauge becomes likely.
A bad gauge can make you chase the wrong issue. It can also make you backwash too often, which wastes water and can disturb sand bed performance.
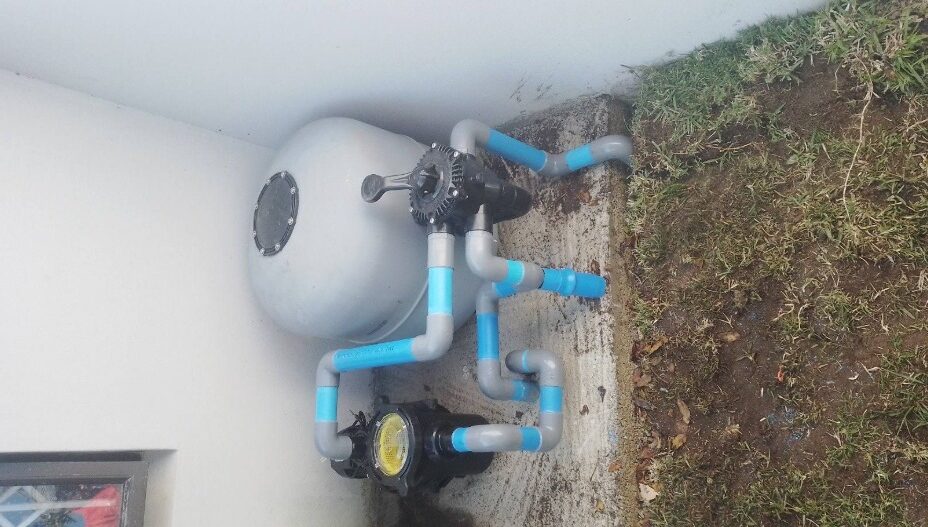
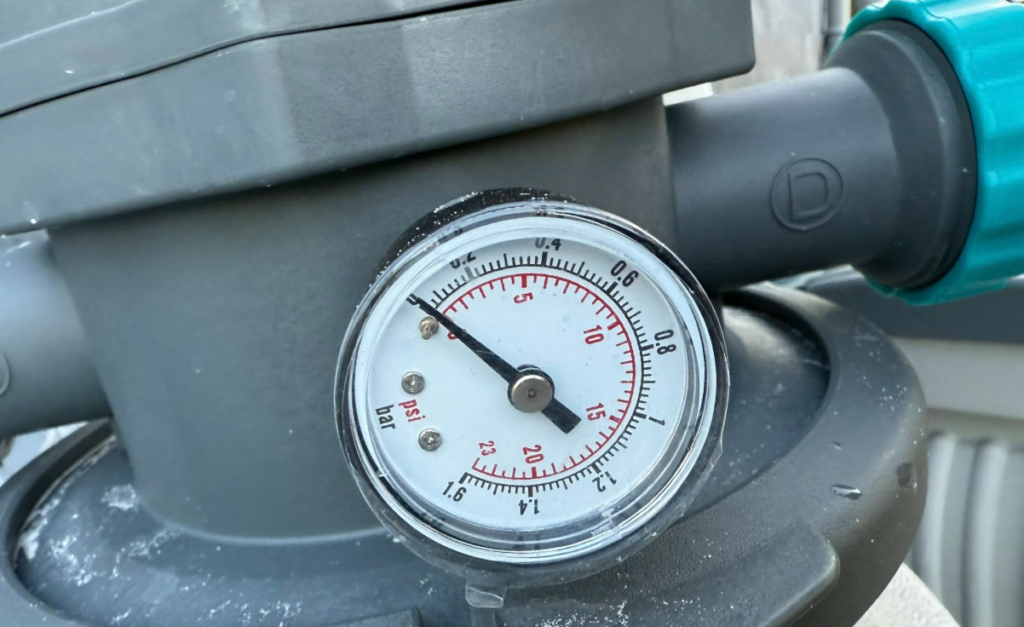
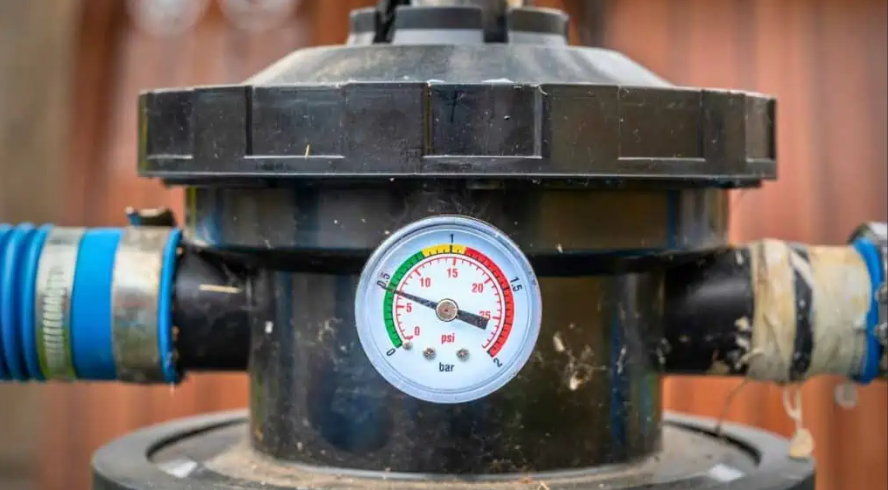
Gauge location on filter tanks and multiport valves
Most pool gauges are installed on the filter tank top, near the air relief valve, or on the multiport valve assembly. The gauge measures pressure on the pressure side a er the pump, usually at the filter inlet or inside the filter body depending on the design.
Knowing where the gauge sits helps interpret readings. A gauge before the filter measures pressure entering the filter. A gauge after a heater or after a restric on can behave differently. Most residen al setups use a standard filter mounted gauge that is adequate for maintenance decisions.
Safety steps: isolate power and release pressure
Before replacing a gauge, switch the pump off at the breaker or isolator, not only at the mer. Then release pressure from the filter tank using the air relief valve. This is critical. Pressurised filters can eject fittings under force. Once pressure is released, confirm the gauge needle drops. If the needle stays high even after pressure release, that is further evidence the gauge is faulty.
Do not try to remove a gauge from a pressurised filter. Always depressurise first.
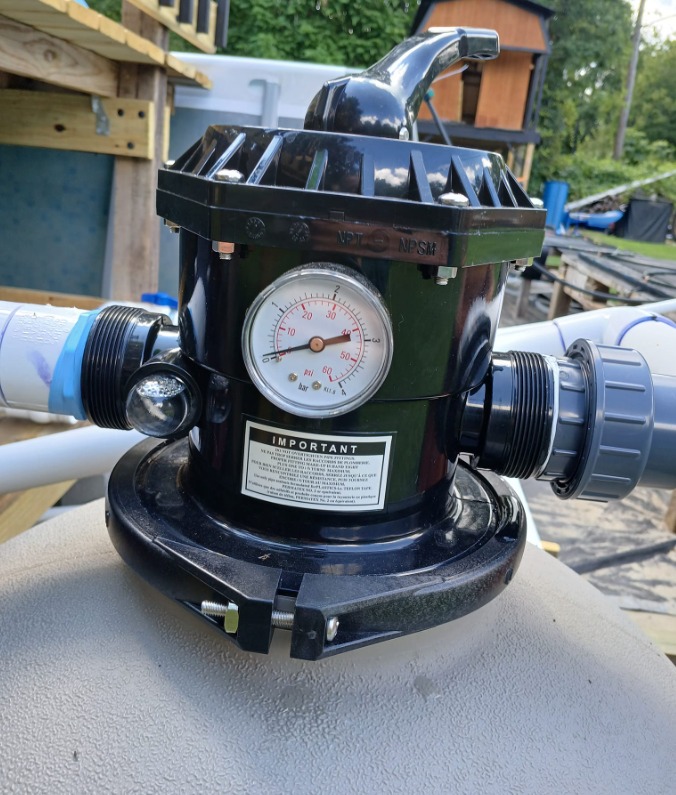
Choosing the correct replacement gauge and pressure range
Pool filter gauges are typically in a common pressure range suitable for residential systems. The goal is to choose a gauge that matches the thread type and provides clear readings in the range your system operates. A gauge that reads too high a maximum can reduce sensitivity, while a gauge that reads too low a maximum may be damaged by normal pressure spikes.
The thread fitting is important. Most use standard threaded ports, but you should confirm your filter specifica on or compare the old gauge fitting. If your equipment pad is exposed to weather, consider a gauge with be er weather resistance, but the key requirement remains accuracy and correct fit.
Removing the old gauge without damaging the port
Once pressure is released, remove the old gauge by turning it counterclockwise. If it is stuck, avoid forcing too hard because filter housings and multiport bodies are often plastic and threads can be damaged. A controlled wrench grip is usually enough. If the gauge breaks and the threaded stem remains, it may need careful extraction. This is why steady pressure is better than sudden twisting.
Inspect the port threads for damage and clean any debris. A dirty port can cause leaks and misalignment.
Installing the new gauge with correct sealing
Most gauge installations require thread sealing to prevent leaks. Use appropriate sealing material as required for pool plumbing threads. The goal is a water tight seal without over ghtening. Overtightening can crack the port housing or distort threads. Tighten until snug and properly seated,then stop.
After installation, ensure the gauge face is oriented so you can read it easily. Do not over rotate just to orient the face, because that can compromise sealing. If orientation matters, adjust sealing approach so it seats correctly without forcing.
Restart and test for leaks and stable readings
Close the air relief valve if it was opened and ensure the filter lid or clamp is secure. Start the pump and purge air through the air relief valve until water flows steadily. Then close the air relief.
Watch the gauge as the system stabilises. The needle should rise smoothly to a steady reading. Check the gauge port for drips. A small drip should be corrected immediately because it can become a steady leak and can also draw air into the system when the pump shuts off.
Now check return jets. The pressure reading should make sense relative to flow. If pressure is high and flow is weak, restriction is likely. If pressure is low and flow is weak, suc on or impeller issues are likely.
Setting your clean baseline pressure and when to clean the filter
The most important value is the clean baseline pressure. After you clean the filter properly, record the gauge reading. This becomes your reference point. As the filter loads, pressure rises. Many pool owners use a percentage rise above baseline as a cleaning trigger. The exact trigger depends on system design, but the key is comparing to your own baseline rather than to someone else’s number.
For sand filters, backwash when pressure rises and flow drops. For cartridge filters, rinse or deep clean when pressure rises and returns weaken. For DE filters, backwash and recharge or tear down clean as needed.
A good gauge makes this decision clear and prevents unnecessary cleaning.
Common mistakes after gauge replacement
One mistake is forgetting to purge air from the filter. Air pockets can cause unstable pressure readings and reduce filtra on area. Another mistake is assuming a specific PSI is normal. Normal pressure is different for every pool because plumbing length, filter size, and pump type differ. Use baseline comparison instead.
Another mistake is leaving a small drip at the gauge port. Small drips can become long term water loss and can corrode nearby components.
Replacing a pool pressure gauge is a simple maintenance action that improves diagnostics across the whole system. A faulty gauge causes false high or low pressure readings and leads to wasted water, wasted me, and misdiagnosed pump issues. Replace the gauge safely by isolating power and releasing pressure, install the new gauge with correct sealing and without over tightening, then record your clean baseline pressure for future filter maintenance decisions.
FAQs
1. How much water loss is normal for a pool?
About 1/4 to 1/2 inch per day from evaporation is normal in warm weather.
2. Can small leaks cause big damage?
Yes. Even a small leak can cause soil erosion, deck damage, and equipment strain over time.
3. How long does leak repair take?
Minor repairs can take a few hours. Major repairs may take several days.
4. Will insurance cover pool leak repairs?
5. How often should I check for leaks?
Get in touch for expert pool care

Need help? we are always here to assist you with expert care
Need Help
+27 10 065 1995
E-mail us
info@poolquest.co.za